
The BEST Chicken Biryani Recipe (Better Than Takeout!)
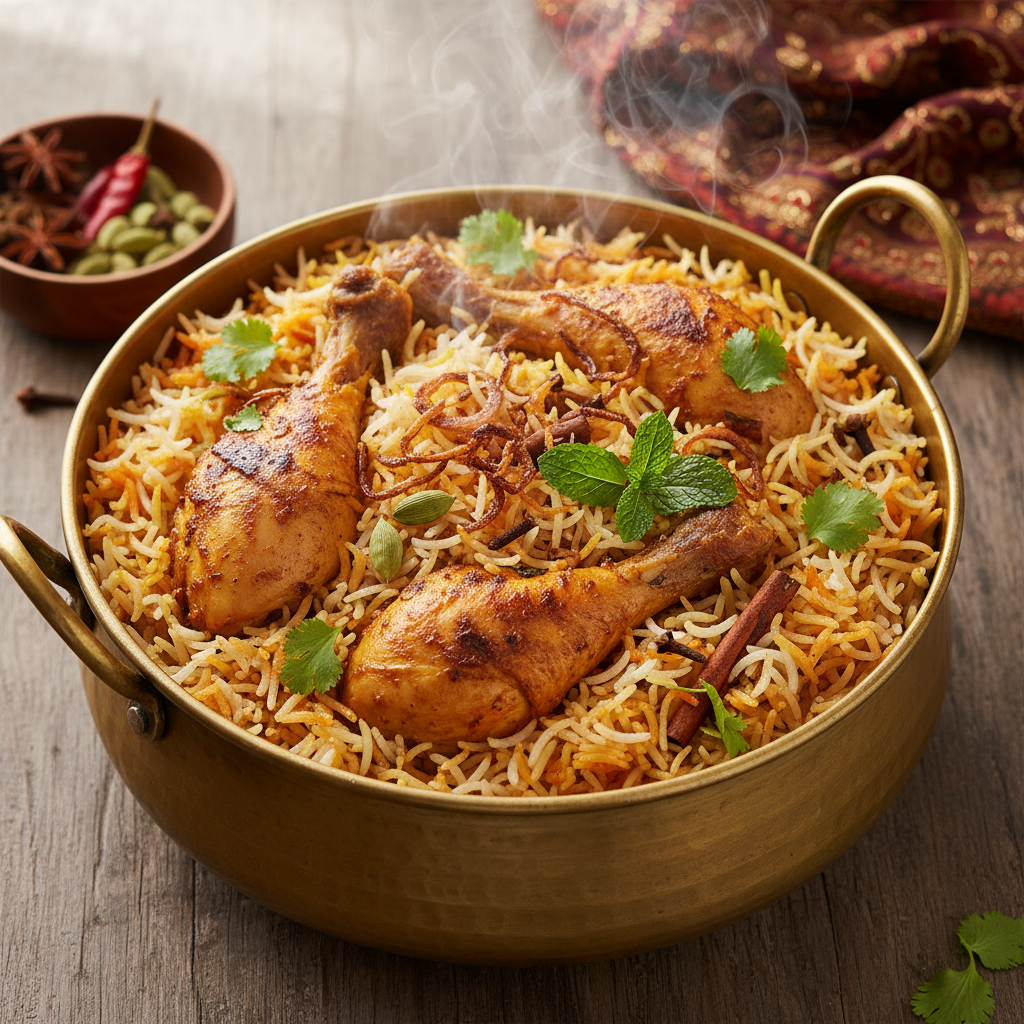
Welcome, food lovers! Today, we're diving headfirst into a culinary masterpiece that needs no introduction: chicken biryani. If the mere mention of succulent chicken, fragrant basmati rice, and a symphony of spices makes your heart flutter, then you've come to the right place. This isn't just a recipe; it’s an experience, a journey to the heart of aromatic Indian cuisine that promises to fill your kitchen with incredible scents and your belly with pure joy.
For many, the thought of making chicken biryani from scratch can feel a little daunting. All those layers, all those spices! But trust me, once you break it down, it's incredibly rewarding and surprisingly achievable in your home kitchen. We're going to walk through each step together, demystifying the process and ensuring you end up with a biryani that’s not only beautiful to look at but utterly delicious. Get ready to impress yourself and everyone at your table!
Why This Chicken Biryani Recipe Works
- Perfectly Layered Flavors: We focus on marinating the chicken for maximum flavor penetration and carefully layer the components, ensuring every bite is a harmonious blend of spices, tender meat, and aromatic rice.
- Achieving Fluffy Basmati: Our method ensures your basmati rice is long-grained, separate, and perfectly cooked, absorbing just the right amount of steam and flavor without becoming mushy.
- Aromatic Spice Blend: We use both whole and ground spices strategically to build a complex, warm, and inviting flavor profile that is the hallmark of authentic biryani.
- The "Dum" Cooking Technique: Sealing the pot allows the biryani to cook in its own steam, gently infusing all the ingredients with each other's aromas and ensuring tender chicken and perfectly cooked rice.
Ingredients You'll Need
Gathering your ingredients is the first exciting step to making incredible chicken biryani. While the list might seem a bit long, each item plays a crucial role in building those signature complex flavors. Don't skimp on fresh ingredients, especially the ginger, garlic, and herbs – they make all the difference!
For the chicken, bone-in, skinless pieces are traditional and add more flavor, but boneless thighs work wonderfully if you prefer. As for rice, premium long-grain basmati is non-negotiable for that classic fragrant texture. Let's make sure you have everything ready before we begin this delicious journey!
- 1.5 lbs (680g) bone-in, skinless chicken pieces (thighs and drumsticks work best)
- 2 cups (400g) aged basmati rice
- 1 cup plain full-fat yogurt
- 1 large onion, thinly sliced and deep-fried until golden (birista)
- 1/2 cup fresh mint leaves, chopped
- 1/2 cup fresh cilantro leaves, chopped
- 3 tbsp ginger-garlic paste
- 2-3 green chilies, slit lengthwise (adjust to taste)
- 1/4 cup ghee or unsalted butter
- 1/2 cup fried onion (from 1 large onion) for garnish
- Lemon wedges for serving
Dry Spices:
- 1 tsp turmeric powder
- 1 tbsp red chili powder (or Kashmiri chili for color)
- 1 tbsp coriander powder
- 1 tsp garam masala
- 1/2 tsp cumin powder
- Salt to taste
Whole Spices:
- 2-3 bay leaves
- 4-5 green cardamom pods
- 4-5 cloves
- 1-inch cinnamon stick
- 1 tsp cumin seeds
Step-by-Step Instructions
Making chicken biryani is all about careful preparation and layering. Don't rush, enjoy the process, and soon you'll be rewarded with an amazing meal. For precise measurements and a clean recipe card, scroll down! Here are some extra tips to guide you through each stage.
1. Marinate the Chicken: In a large bowl, combine the chicken pieces with yogurt, ginger-garlic paste, red chili powder, turmeric powder, coriander powder, cumin powder, garam masala, salt, half of the fried onions, mint, and cilantro. Mix well until the chicken is thoroughly coated. Cover and refrigerate for at least 2 hours, or preferably overnight, for best flavor.
2. Prepare the Basmati Rice: Rinse the basmati rice several times under cold water until the water runs clear. This removes excess starch, preventing sticky rice. Soak the rice in ample cold water for 30 minutes. Drain well before cooking.
3. Cook the Rice (Partially): Bring a large pot of water to a rolling boil. Add 1 tablespoon of salt, a bay leaf, 2-3 green cardamom pods, and a small piece of cinnamon stick to the water. Add the drained basmati rice and cook for just 5-7 minutes, or until it's about 70-80% cooked. The grains should be pliable but still have a slight bite. Drain immediately and spread on a baking sheet to cool slightly and stop the cooking process.
4. Cook the Chicken Masala: In a heavy-bottomed pot or Dutch oven (the same one you'll use for biryani), heat the ghee over medium heat. Add the whole spices (bay leaves, remaining green cardamom, cloves, cinnamon stick, cumin seeds) and let them sizzle for 30 seconds until fragrant. Add the marinated chicken mixture and green chilies. Cook on medium-high heat for 10-15 minutes, stirring occasionally, until the chicken is about half-cooked and the gravy has thickened slightly. The yogurt might curdle a bit initially, but it will smooth out as it cooks.
5. Layer the Biryani: Once the chicken is half-cooked, reduce the heat to low. Spread half of the partially cooked rice evenly over the chicken mixture. Sprinkle with some chopped mint, cilantro, and a portion of the remaining fried onions. Repeat with the remaining rice, herbs, and fried onions. You can also drizzle 1-2 tablespoons of warm milk infused with a pinch of saffron for extra color and aroma, if desired.
6. Dum Cooking (Steaming): Cover the pot tightly with a lid. If your lid isn't airtight, you can seal the edges with a strip of dough made from flour and water. Cook on very low heat for 25-30 minutes. This "dum" cooking process allows the flavors to meld and the rice to finish cooking with the steam from the chicken masala. Avoid lifting the lid during this phase!
7. Rest and Serve: Once done, turn off the heat and let the biryani rest, still covered, for at least 15-20 minutes. This resting period is crucial for the flavors to settle and the rice grains to firm up. Gently fluff the biryani with a fork, mixing the layers slightly. Serve hot with raita (yogurt dip), salad, and lemon wedges.
Chef's Tips for Perfect Chicken Biryani
- Don't Skip the Marination: The longer the chicken marinates, the more tender and flavorful it will be. Overnight is truly best for this chicken biryani.
- Fry Your Onions Golden: Properly fried 'birista' adds a delightful sweetness and crunch. Take your time with this step, frying them slowly until deep golden brown and crispy, not burnt.
- Layering is Key: Don't just dump all the ingredients in! The layering allows different flavor profiles to develop and steam together beautifully.
- The Power of "Dum": The sealed cooking method is what makes biryani distinct. It ensures every grain of rice and piece of chicken is permeated with those incredible aromas. Resist the urge to peek!
Common Mistakes to Avoid
Even seasoned cooks can stumble when making something as intricate as chicken biryani. Being aware of these common pitfalls will help you achieve biryani perfection every time. One of the biggest challenges often revolves around cooking the rice correctly – either undercooked, overcooked, or sticky.
1. Overcooking the Rice during Parboiling: If your rice is too soft before layering, it will turn mushy during the 'dum' cooking. Aim for 70-80% cooked; it should still have a slight resistance when you bite it.
2. Not Marinating Long Enough: A short marination time results in bland chicken. Give it ample time to soak in those flavors. Overnight is ideal.
3. Lifting the Lid During Dum: Breaking the seal prematurely releases all the precious steam and aromas, preventing proper cooking and flavor development. Patience is a virtue here!
For more detailed troubleshooting on getting your rice just right, especially when dealing with texture issues, check out our complete Rice Troubleshooting Guide. It has everything you need to know to ensure fluffy, perfectly cooked rice every single time, no matter the dish.
Frequently Asked Questions
Can I make chicken biryani in a pressure cooker?
Yes, you can! The method is slightly different. You'll layer the chicken and rice in the pressure cooker and then cook for a specific time under pressure, followed by a natural release. It's a quicker method, but the 'dum' method often yields a more authentic, subtly layered flavor.
What can I serve with chicken biryani?
Chicken biryani is often a meal in itself, but it pairs beautifully with a simple raita (yogurt with cucumber and a hint of spice), a kachumber salad (diced onion, tomato, cucumber), or even a rich salan (peanut-based curry).
Can I prepare chicken biryani ahead of time?
You can certainly marinate the chicken the day before. The assembled and cooked biryani can be reheated gently on the stovetop or in the microwave, though fresh is always best. Store leftovers in an airtight container for up to 3 days in the refrigerator.